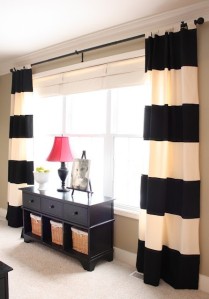
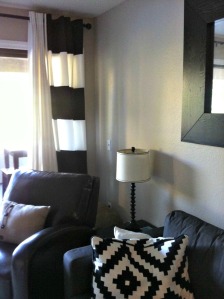
My living room has been sort of an “un-designed” space. We are slowly accumulating furniture you actually want to sit on, but still have lots of hand-me-down pieces. So, in the spirit of changing my “un-designed” room to a “designed” room, I wanted to start with some curtains.
I have been eying these bold striped curtains all over pinterest, and of course, like my Horse Art, can’t afford to buy them.
So…Duh da duh! (trumpets trumping) I made them!
I started with plain white $24.99 curtains from Ikea.
Laid them down on my dirty carpet and ironed out most of the wrinkles.
Then I measured out my stripes. I wanted big thick stripes, so I made them 13” wide. I used plain blue painters tape and pressed down super hard to seal the edges (or so I thought…)
I laid trash bags down on my dirty carpet under the curtains in case the paint bled through. Then I started painting. I just picked up some generic black paint from Michaels. I really had NO clue what kind to use but it looks like this:
 (I found the paint in the craft paint section. Very bottom…it had an apple on it and it took 2 large jars of it to cover the 2 panels)
And started rolling. I used a cheap foam (tiny) roller also from Michaels. The painting was taking FOREVER, so I just started dumping paint on there and rolling it out. That sure sped things up. I did one really thick coat and then pulled up the tape while it was still wet.
Looks pretty good! I touched up some thinner spots and cringed at some of my mistakes.
Whoops
Whoops again
You can’t really see the mistakes when they are hanging up.
Now I just need to hem them!
-Megan


